Download MD4 Beta9 - 5th May 2017
Contents
- Installation
- MD4 Setup
- HDSDR Setup
- Main Screen
- Define a Monitor
- Log Review
- FUNcube Dongle - Band II FM Screenshot
- FUNcube Dongle - HF 20m Screenshot
- Take Reference Screenshot
- 6m Beacon Monitoring
Installation
Unzip ALL files into a directory of your choice and run "Meteor Detector for HDSDR.exe"
MD4 Setup
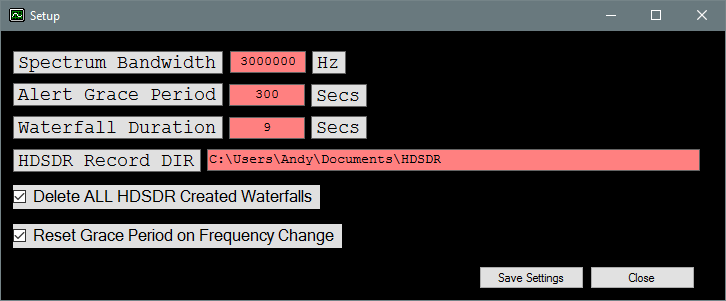
- Spectrum Bandwidth: Set this to the displayed bandwidth within HDSDR.
- This is defaulted to 6MHz (6000000) the max bandwidth of a ELAD FDM-S2
- Use 192000 for FUNcube Dongle Pro+
- Use 2400000 for RTL SDR at 2.4 Msps (2400 ksps)
- Alert Grace Period: After a signal is detected this is the time MD4 waits before generating any more alerts
- Waterfall Duration: This is the total time displayed in the waterfall. I find the fastest setting in HDSDR works best for me and this is a duration of 9 seconds from the top of the waterfall to the bottom
- HDSDR Record DIR: This is where HDSDR saves your recordings and waterfalls
- Delete ALL HDSDR Created Waterfalls: Deletes all HDSDR_*.bmp's from the above HDSDR Record DIR
- Reset Grace Period on Frequency Change: If grace period active then reset's to zero (i.e. grace period off) when LO changes
HDSDR Setup
Check that the recording directory matches what you have set in MD4
Adjust the Speed slider to the far right to give you a much more finer resolution making it easier to spot meteor's in the waterfall. Note this is likely to increase CPU usage. You can have a slower waterfall Speed in HDSDR and it will still work, it's worth just playing with the settings
Press CTRL+SHIFT+W to bring up the waterfall saving dialog box and enter a time value that matches the duration of your waterfall, fastest is 9 seconds. Note at the time of writing 0 does not disable saving of the waterfall once activated. If you restart HDSDR this will stop the saving of the waterfall's
BE AWARE that the waterfall images can take up a notable amount of hard drive space over a long period of time
Main Screen

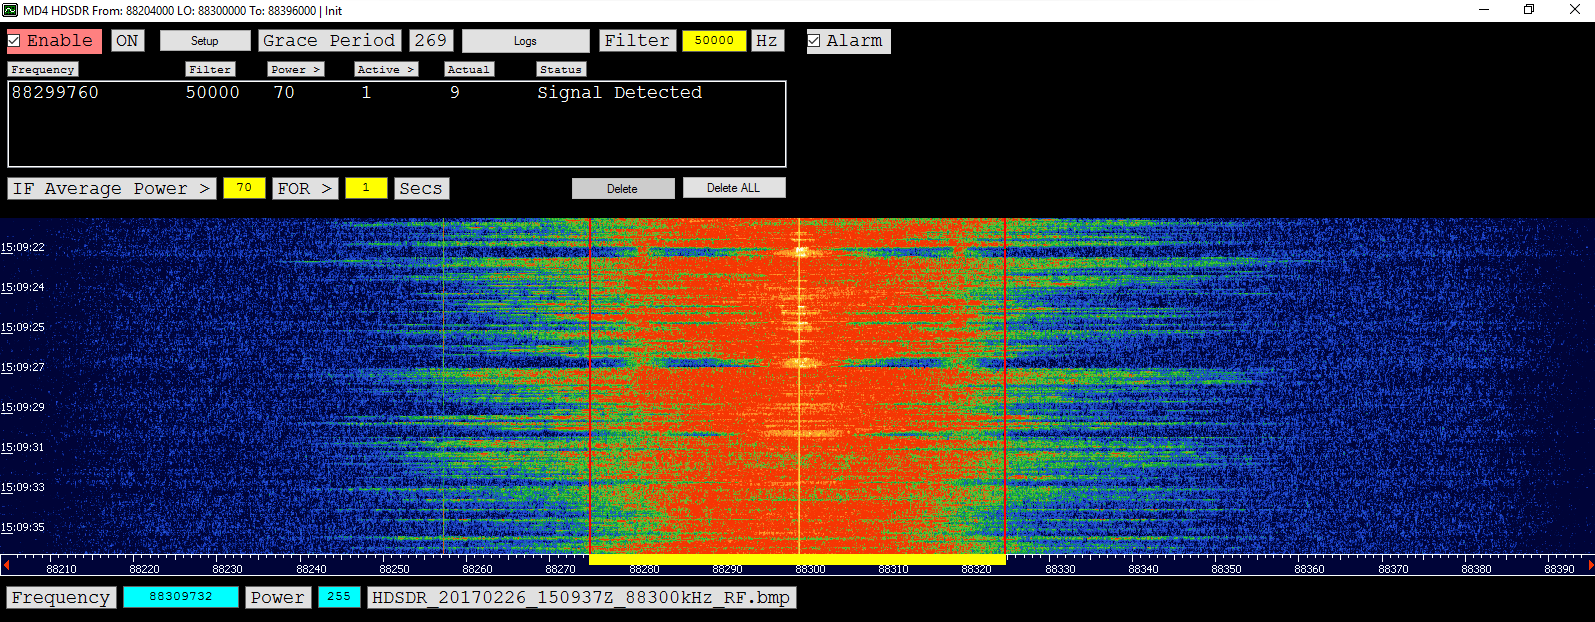
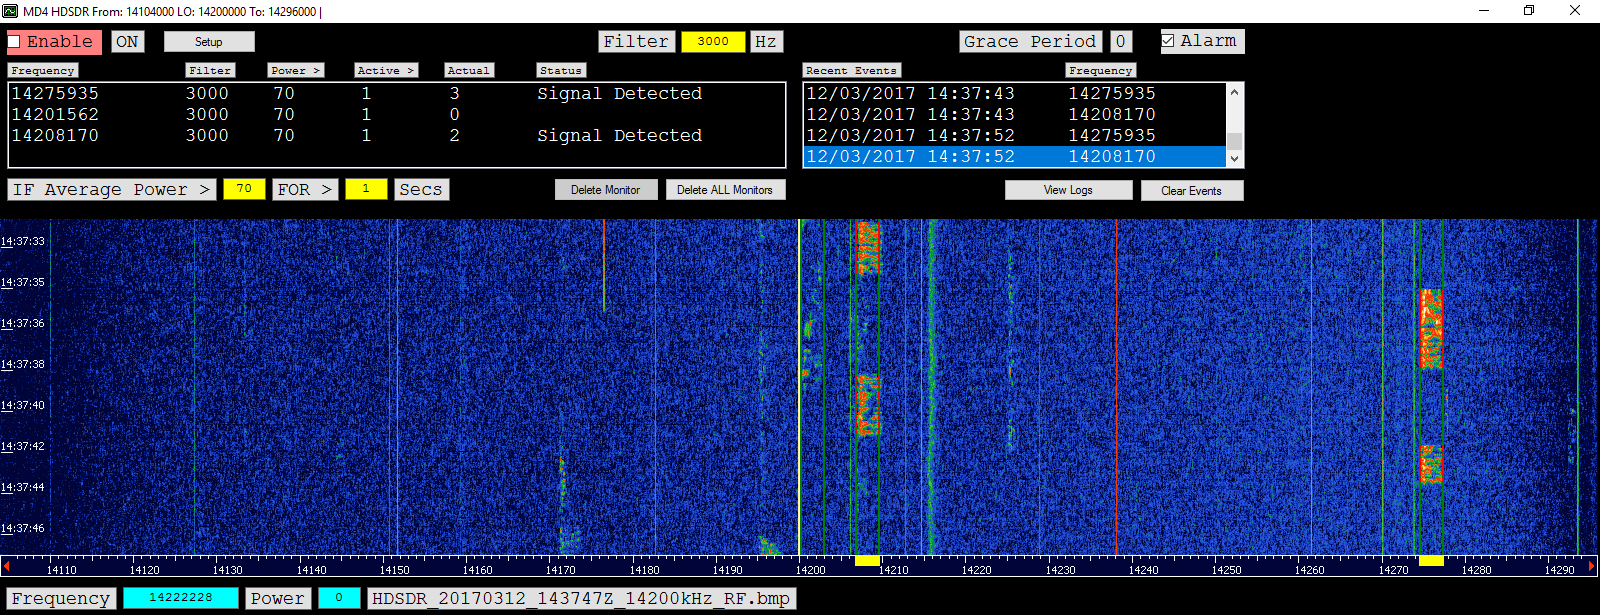
The green vertical bars (see far left of spectrum) highlight the defined monitors. These turn red when a signal is detected between them
- Enable checkbox: Enables and disables realtime waterfall analysis
- Setup: Opens up the setup screen
- Grace Period: If non zero then it means grace period is active and no further alerts will be generated until it returns to zero
- Logs: Open the log reviewing screen
- Filter: This is the size of the monitor filter (green bar to green bar)
- Alarm: Toggle audio alarm on and off (does not affect logging)
- ListBox: The list box lists all the currently defined monitors as well as the duration determined from the currently displayed waterfall
- The IF Average Power > etc settings are the values which will be used when you click on the displayed waterfall as illustrated below:
- Recent Events list box displays the most recent meteor detections
- Take Reference Screenshot: This can be used to take a screenshot during flat (normal) radio conditions. This can then be used to compare against DX conditions, see screenshot

Define a Monitor
Just click on the waterfall to choose the frequency to monitor
When a monitor is triggered a yellow rectangle appears at the bottom of the waterfall
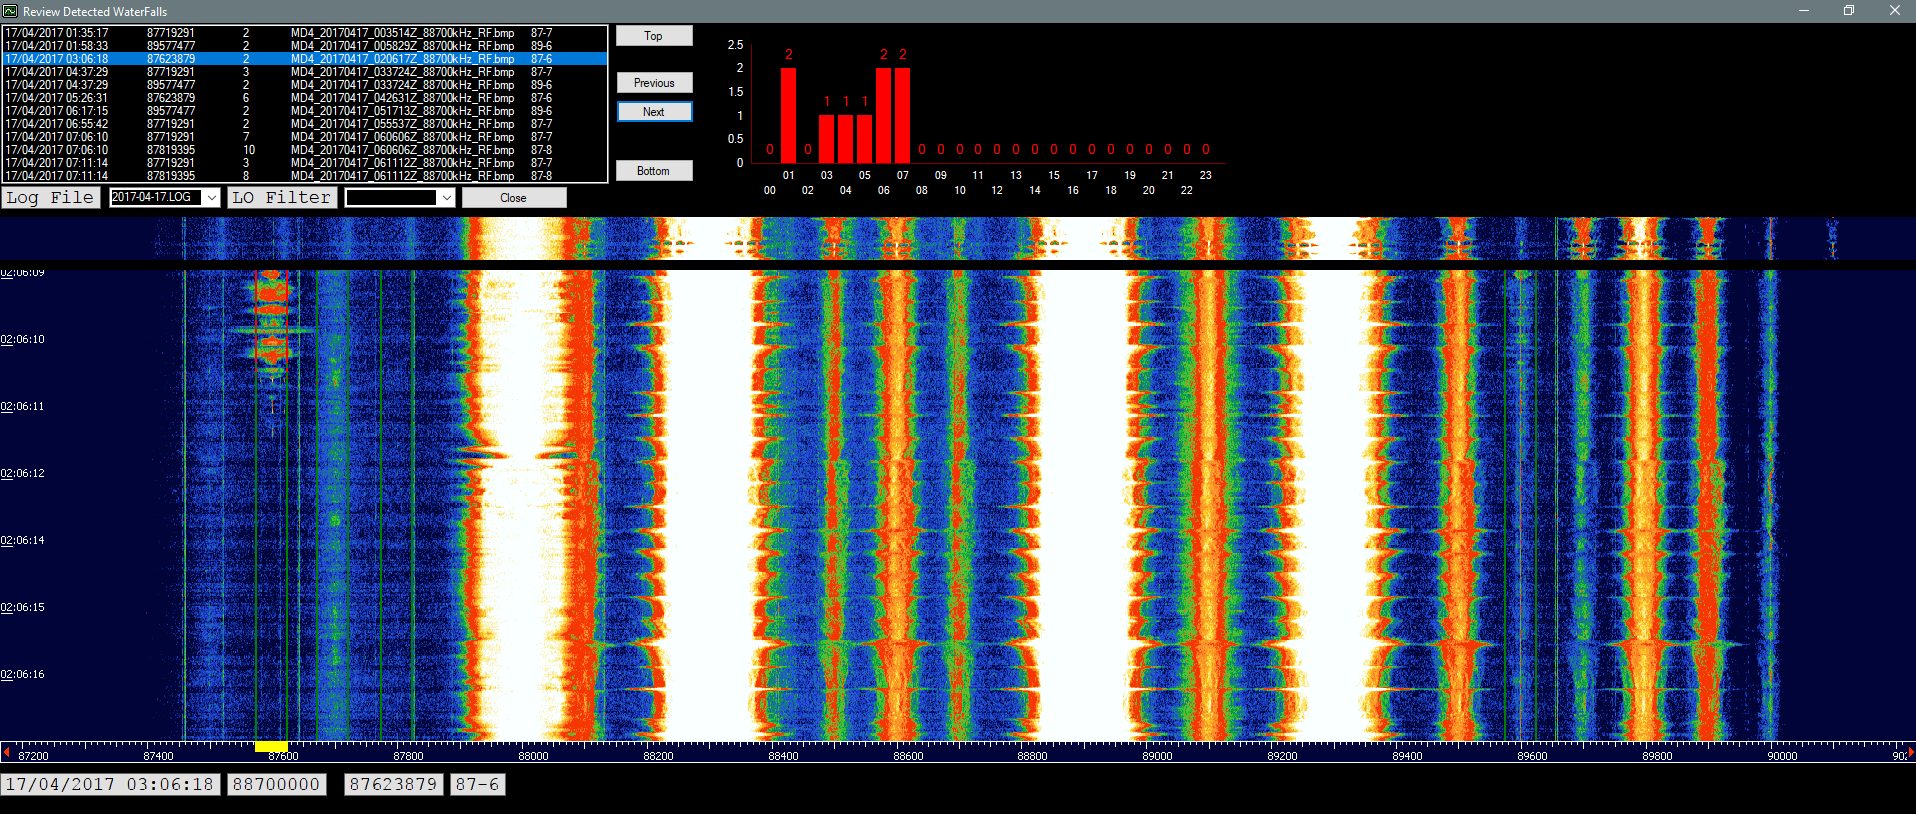
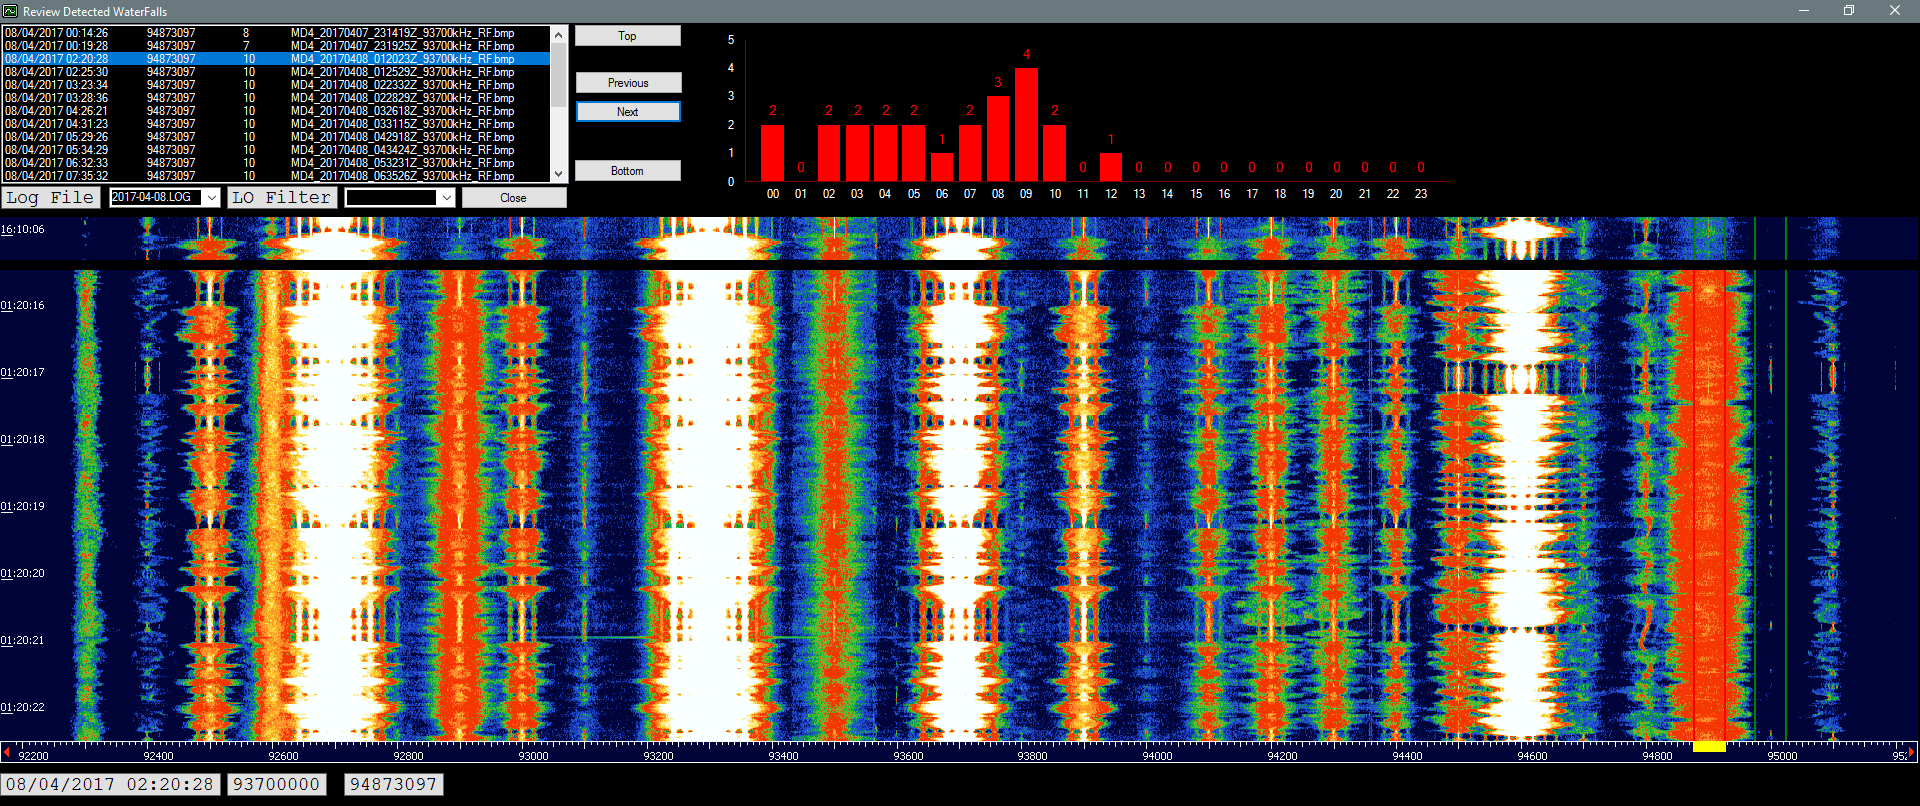
Log Review
Simply select the log file from the drop down and then use the next and previous buttons to cycle through the MD4 screenshots
The graph illustrates the number of events per hour
FUNcube Band II FM Screenshot
Signal detection single frequency on FM broadcast
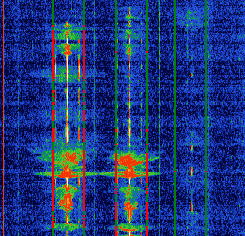
FUNcube HF 20m Screenshot
Multiple signal detection on HF 20m, note filter bandwidth of 3000Hz
Reference Screenshot
The following is an example of how during log review you can compare DX conditions against reference flat (normal) radio conditions --- the reference screenshot is displayed above the screenshot of the logged event.
Notice in the example below how 94900 has a signal; whereas normally it does not
A reference screenshot is taken using the Take Reference Screenshot button on the main screen
Beacon Monitoring
To detect beacons; tune to the desired band and create the required monitors (using a filter width of 100 Hz) as per screenshot below
![]()